
Install and connect
- Use a private ComfyUI instance running version 0.45.x. After Registry indexing, search for Cormak Nodes in ComfyUI Manager and install it. Until then, use the GitHub Release archive for manual installation. Restart ComfyUI.
- Open the Cormak sidebar and click Connect Cormak. Sign in or create a free account in your browser, allow the requested permissions, then return to ComfyUI.
- Check the credit cost for your quality setting. Enter the maximum you accept in credit_cap. If Cormak requests approval, approve it and queue the same workflow again with the same run_number.
Text to 3D
Describe an object in Cormak Text to 3D. Connect its GLB output to Preview 3D (Advanced), then Save 3D Model to export it.
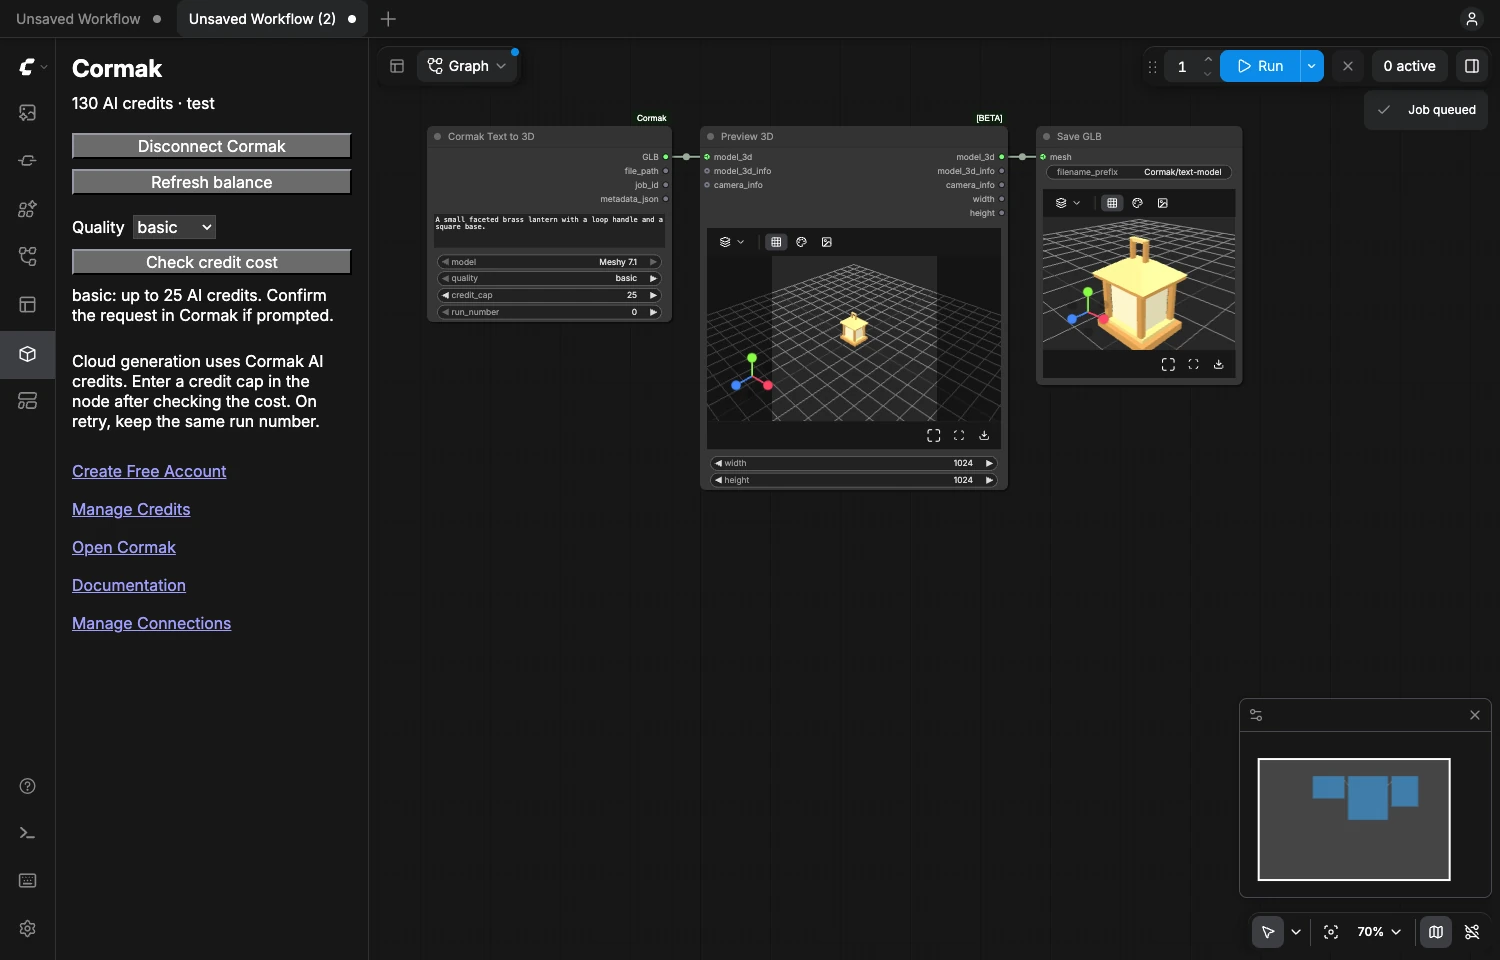
Image to 3D
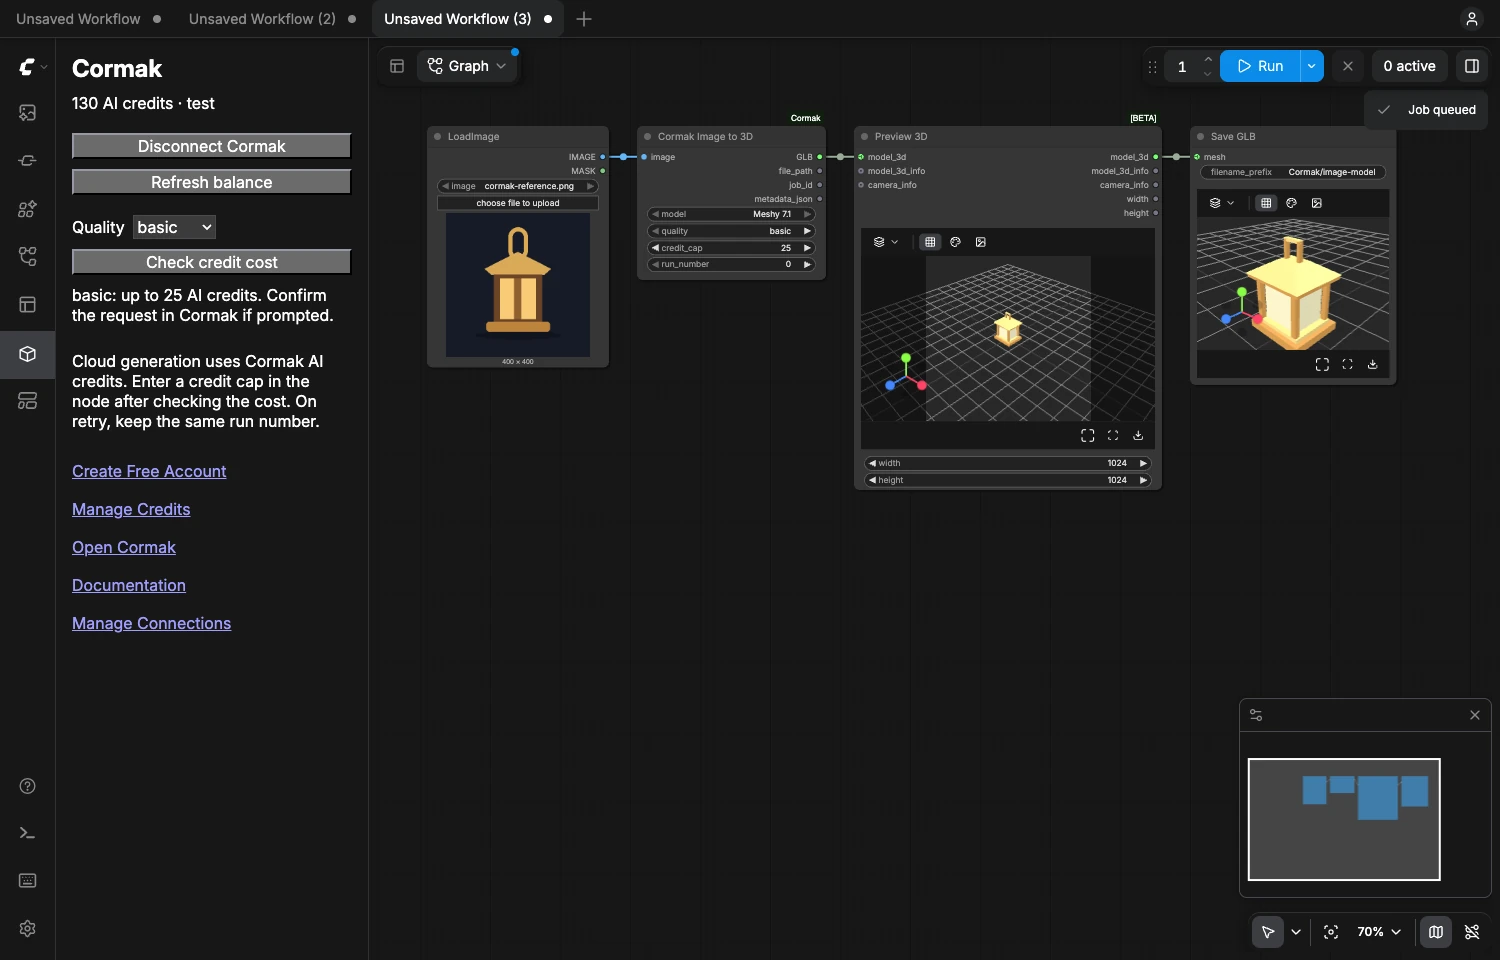
Connect one image from Load Image to Cormak Image to 3D. Use the same preview and GLB export nodes.
Credits, files and privacy
The nodes send the description or image you choose to Cormak. Sign-in tokens stay in server memory and never appear in workflow files. A private remote server works through an SSH tunnel or an authenticated HTTPS proxy. You can disconnect in the sidebar or revoke the connection on Cormak.