
How do I fill ACF fields automatically with AI?
Open a post, page or custom post type that has an ACF field group. The Cormak.app AI Autofill box appears in the sidebar with every supported field listed and the empty ones already selected. Click Fill with AI, check the preview and apply the values you want. Then click Update as usual.
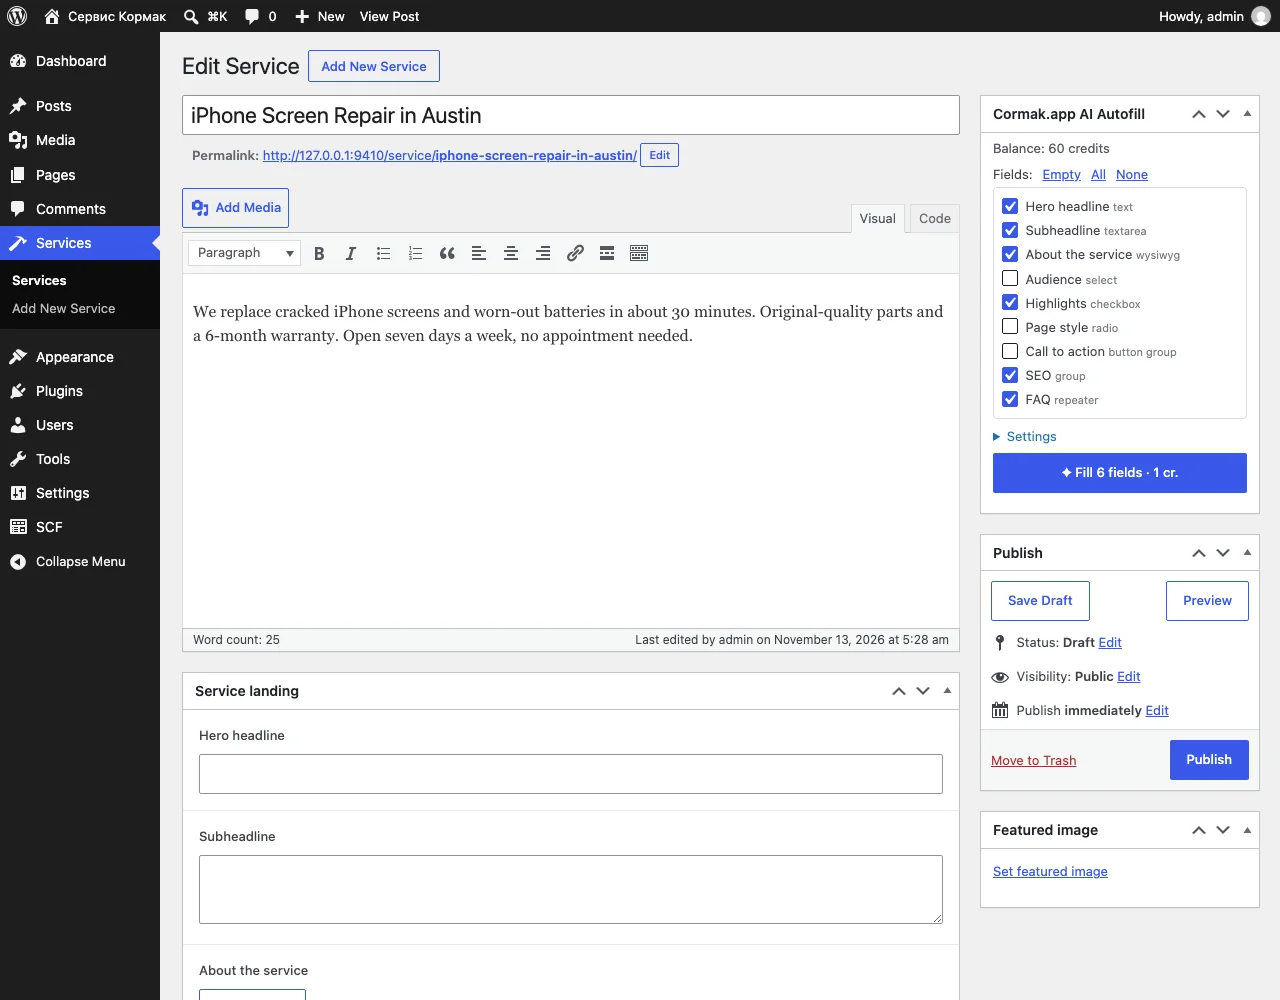
- Choose the fieldsKeep the pre-selected empty fields, or click All, Empty or None. Under Settings you can change the tone, length, keywords and add extra instructions for this run.
- Review the previewEach generated value has its own checkbox. Choice fields show the option labels, repeaters show the rows that will be added.
- Apply and saveClick Apply selected. The values go into the ACF form, so nothing is saved and nothing you typed is lost until you click Update.
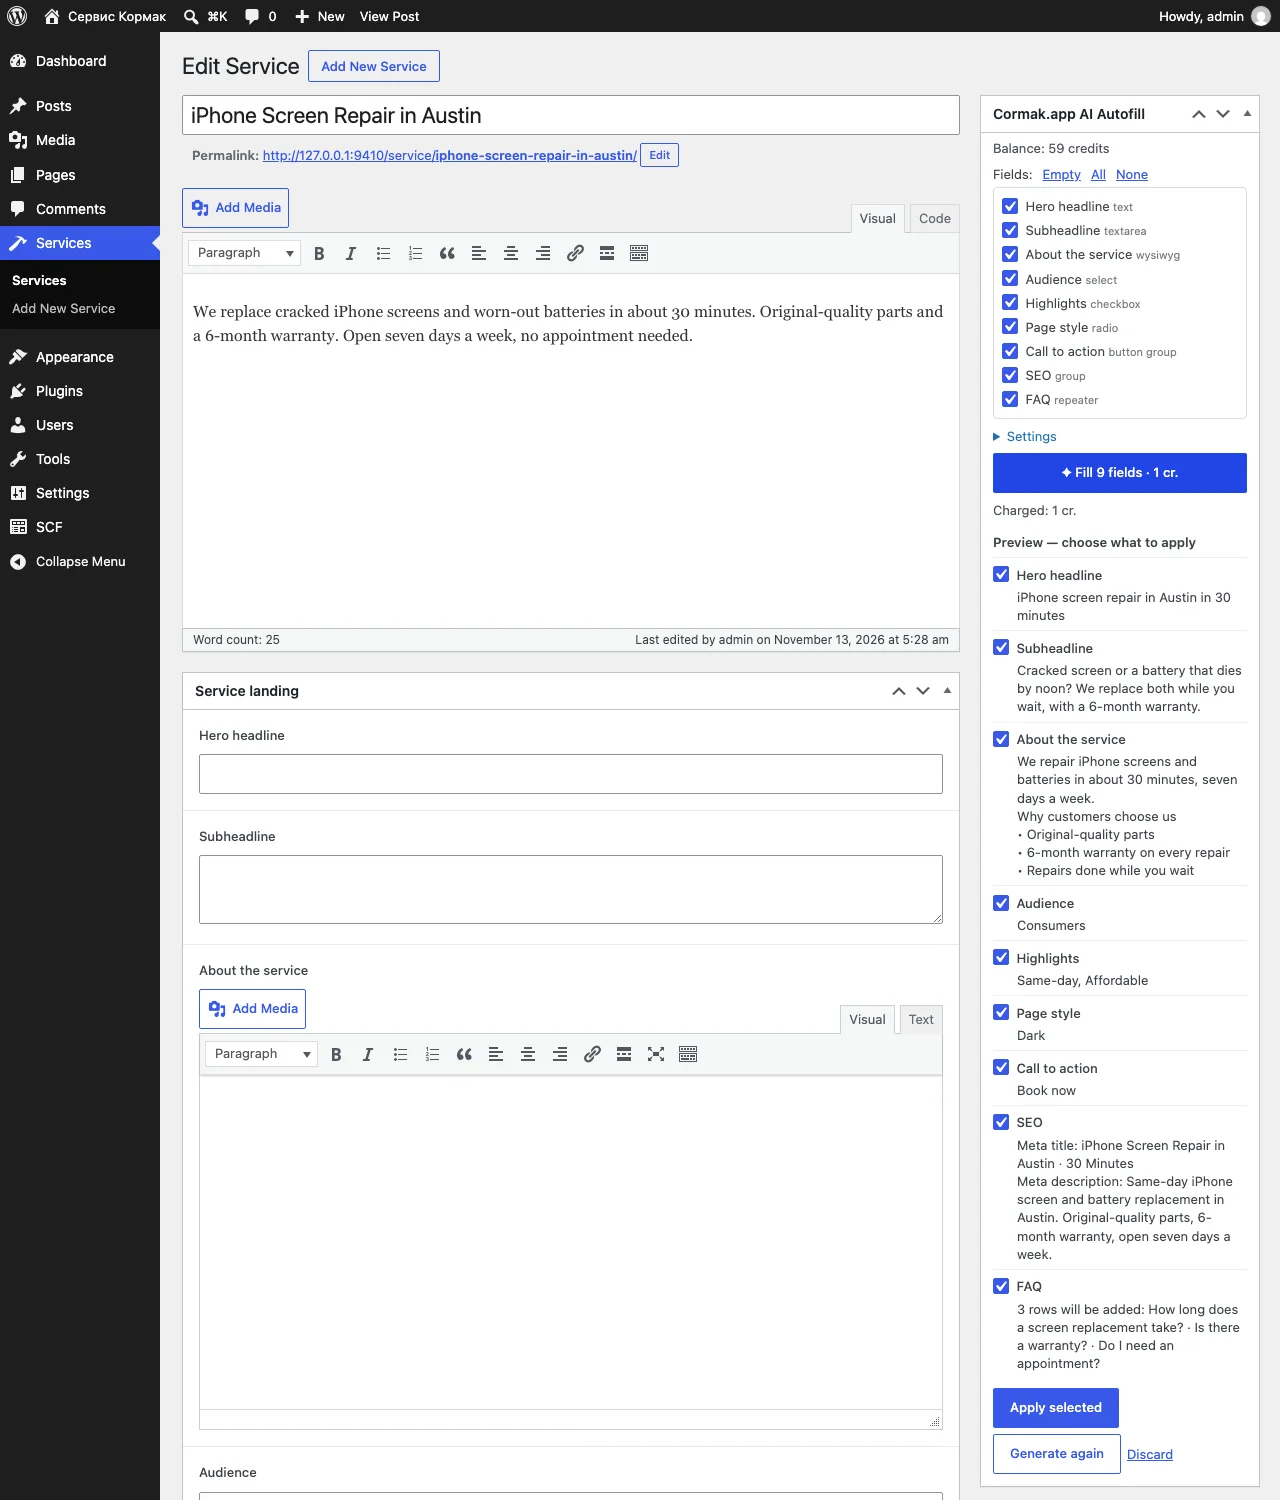
Read the step-by-step ACF autofill tutorial.
Which ACF field types can AI fill?
| Field type | What the AI writes |
|---|---|
| Text | Headlines, names, short lines. The field’s character limit is respected. |
| Textarea | Subheadlines, summaries, meta descriptions. |
| WYSIWYG | Clean HTML with paragraphs, subheadings and lists. |
| Select, Checkbox, Radio, Button group | The AI picks only from the choices you defined. |
| Group | Sub fields are filled together, for example an SEO group with a meta title and a meta description. |
| Repeater | Rows within your minimum and maximum: FAQ, benefits, steps, features. Requires ACF PRO or Secure Custom Fields. |
Other types, such as image, number, email, relationship and flexible content, are never sent to the AI and never changed.
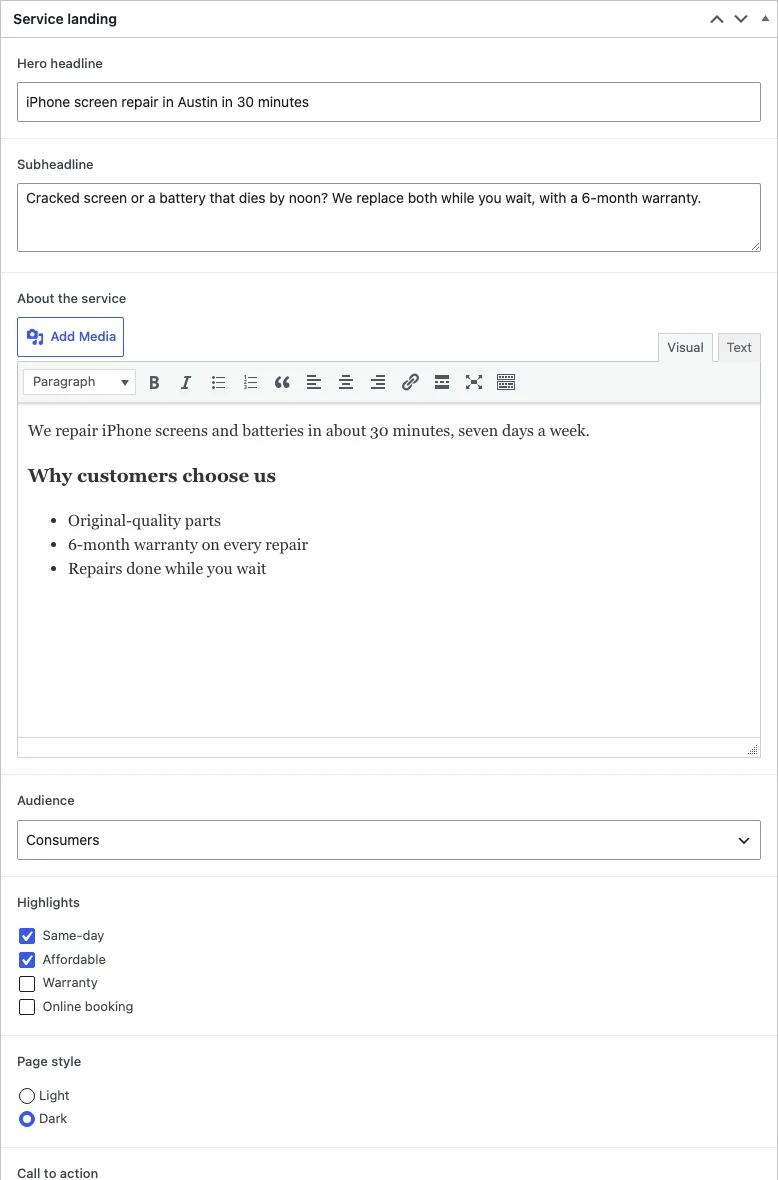
Can AI fill ACF repeater and group fields?
Yes. A group is filled sub field by sub field, which works well for SEO groups, contact blocks or hero sections. A repeater gets rows within the minimum and maximum you set in ACF, up to ten, so an FAQ, a list of benefits or a set of steps is written in one pass. On the edit screen, new repeater rows are added after the rows you already have.
How do I bulk fill ACF fields across many posts?
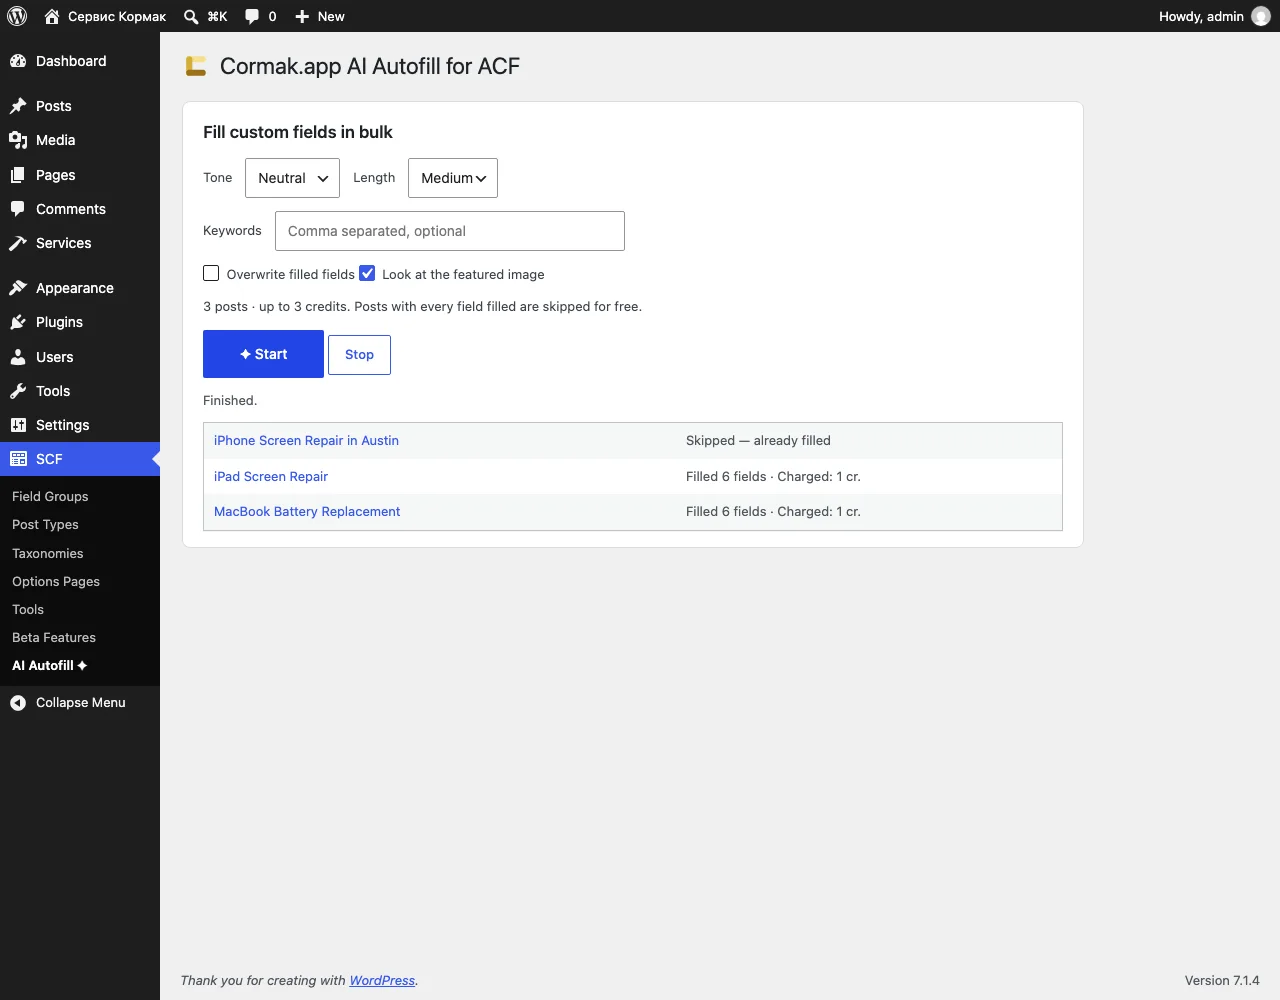
Select posts in the list, choose Fill custom fields with AI under Bulk actions and click Apply. Cormak fills up to 200 posts per run, two at a time, and shows a status for each post.
- Select the postsUse any post type list: Posts, Pages, or your custom post type such as Services or Locations.
- Choose optionsPick the tone and length and add keywords if needed. Leave Overwrite filled fields unchecked to keep everything you already wrote.
- StartThe summary shows the maximum cost. Posts with every field filled are skipped without a charge.
How do I tell the AI what each ACF field is for?
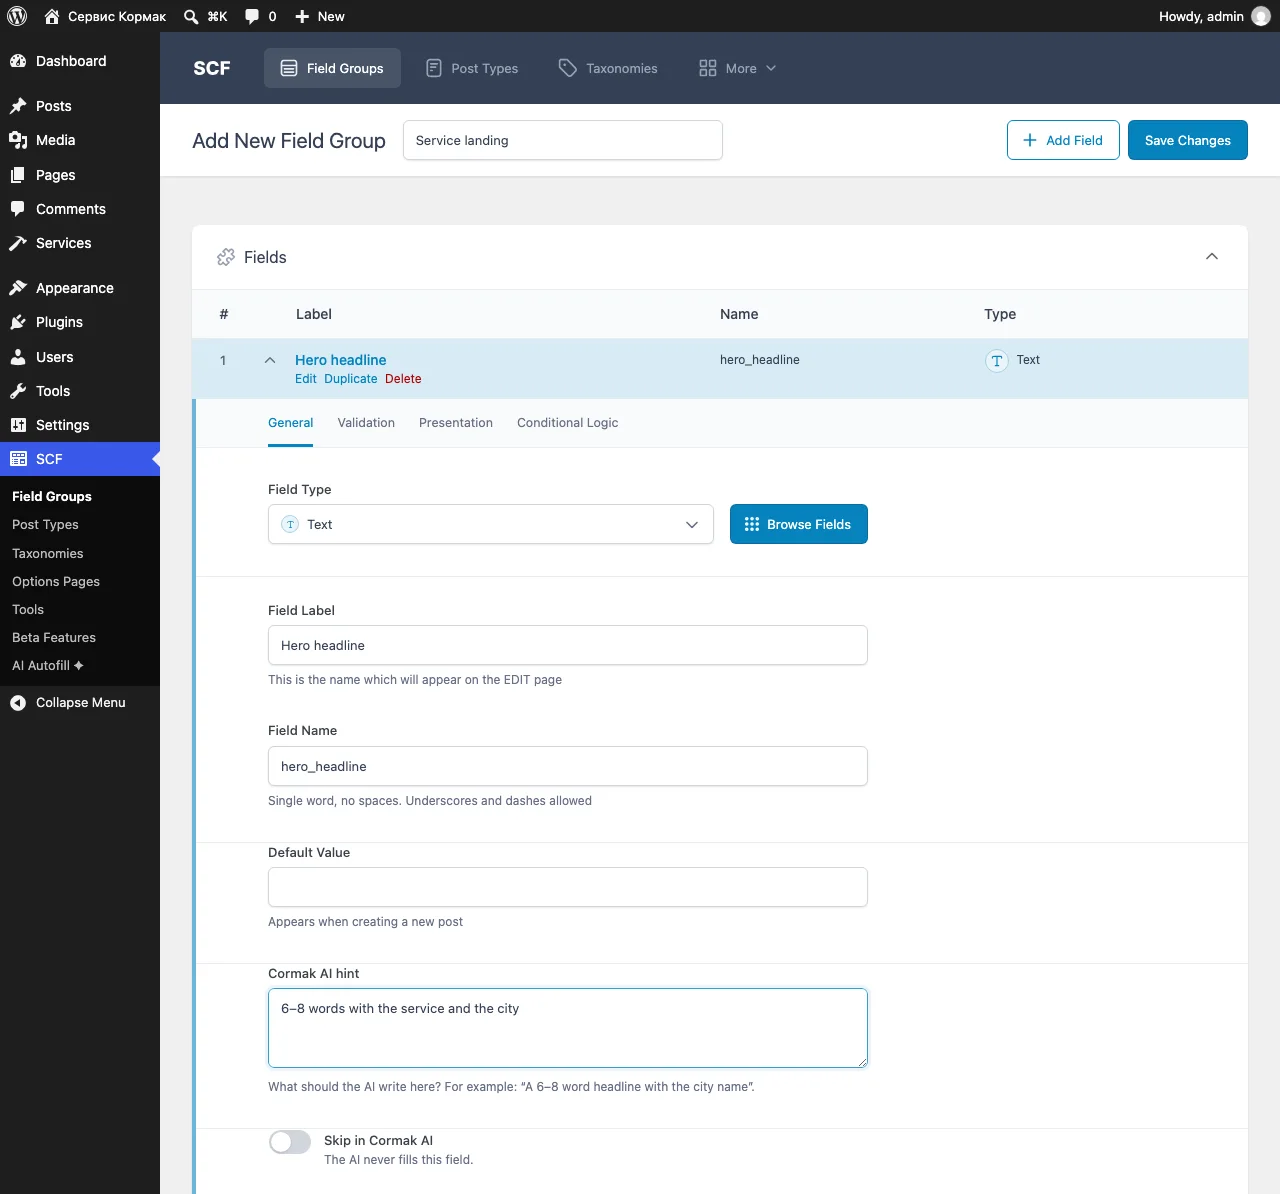
The plugin adds two settings to every supported field in the ACF field editor. Cormak AI hint tells the AI exactly what to write, for example “6–8 words with the service and the city”. Skip in Cormak AI keeps a field such as a phone number, a price or legal text away from the AI. The field label, instructions and placeholder are used too.
Setup guide
- Install and activateWith ACF, ACF PRO or Secure Custom Fields active, go to Plugins → Add New Plugin, search for Cormak ACF and click Install Now → Activate. You can also download it from WordPress.org and use Upload Plugin.
- Connect CormakOpen ACF → AI Autofill ✦ (or Settings → AI Autofill ✦) and click Connect Cormak. Sign in or create an account and set a daily limit for this site. Your WordPress admin must use HTTPS.
- Add field hints (optional)In ACF → Field Groups, open a field and write a Cormak AI hint, or turn on Skip in Cormak AI for fields the AI should leave alone. Set your default tone, language and brand rules on the plugin settings page.
- Fill one postOpen a post with ACF fields, click Fill with AI in the sidebar box, review the preview, click Apply selected and then Update.
- Fill in bulkSelect posts in the list, choose Fill custom fields with AI in Bulk actions and click Start. Open a few posts afterwards and check the values before publishing.
Selling products? See the Cormak plugin for WooCommerce for product descriptions, Excel import and product photos.