What you need
- WordPress 6.5 or newer with Advanced Custom Fields, ACF PRO or Secure Custom Fields active.
- At least one ACF field group assigned to posts, pages or a custom post type.
- A WordPress admin served over HTTPS, so the Cormak account can be connected.
- A Cormak account. It is created during the connection and comes with free starter credits.
1. Install the plugin and connect Cormak
- Install the pluginIn WordPress go to Plugins → Add New Plugin, search for Cormak ACF and click Install Now → Activate. Or download the ZIP from WordPress.org and use Upload Plugin.
- Open the settingsGo to ACF → AI Autofill ✦. If the ACF menu is hidden on your site, the page is under Settings → AI Autofill ✦.
- Connect your accountClick Connect Cormak, sign in or create an account and approve the connection. On the consent page, set a daily limit: the number of fills this site may run per 24 hours.
- Set your defaultsChoose the tone of voice, the length of long texts, the language and your brand rules, for example “Family dental clinic in Austin; address readers as you; never promise prices.” Save the settings.
Only administrators can connect or disconnect the account. Editors and administrators can then fill fields on the posts they are allowed to edit. Your Cormak password never reaches WordPress: the connection uses OAuth, and tokens are stored encrypted with your site keys.
2. Prepare your field group with AI hints
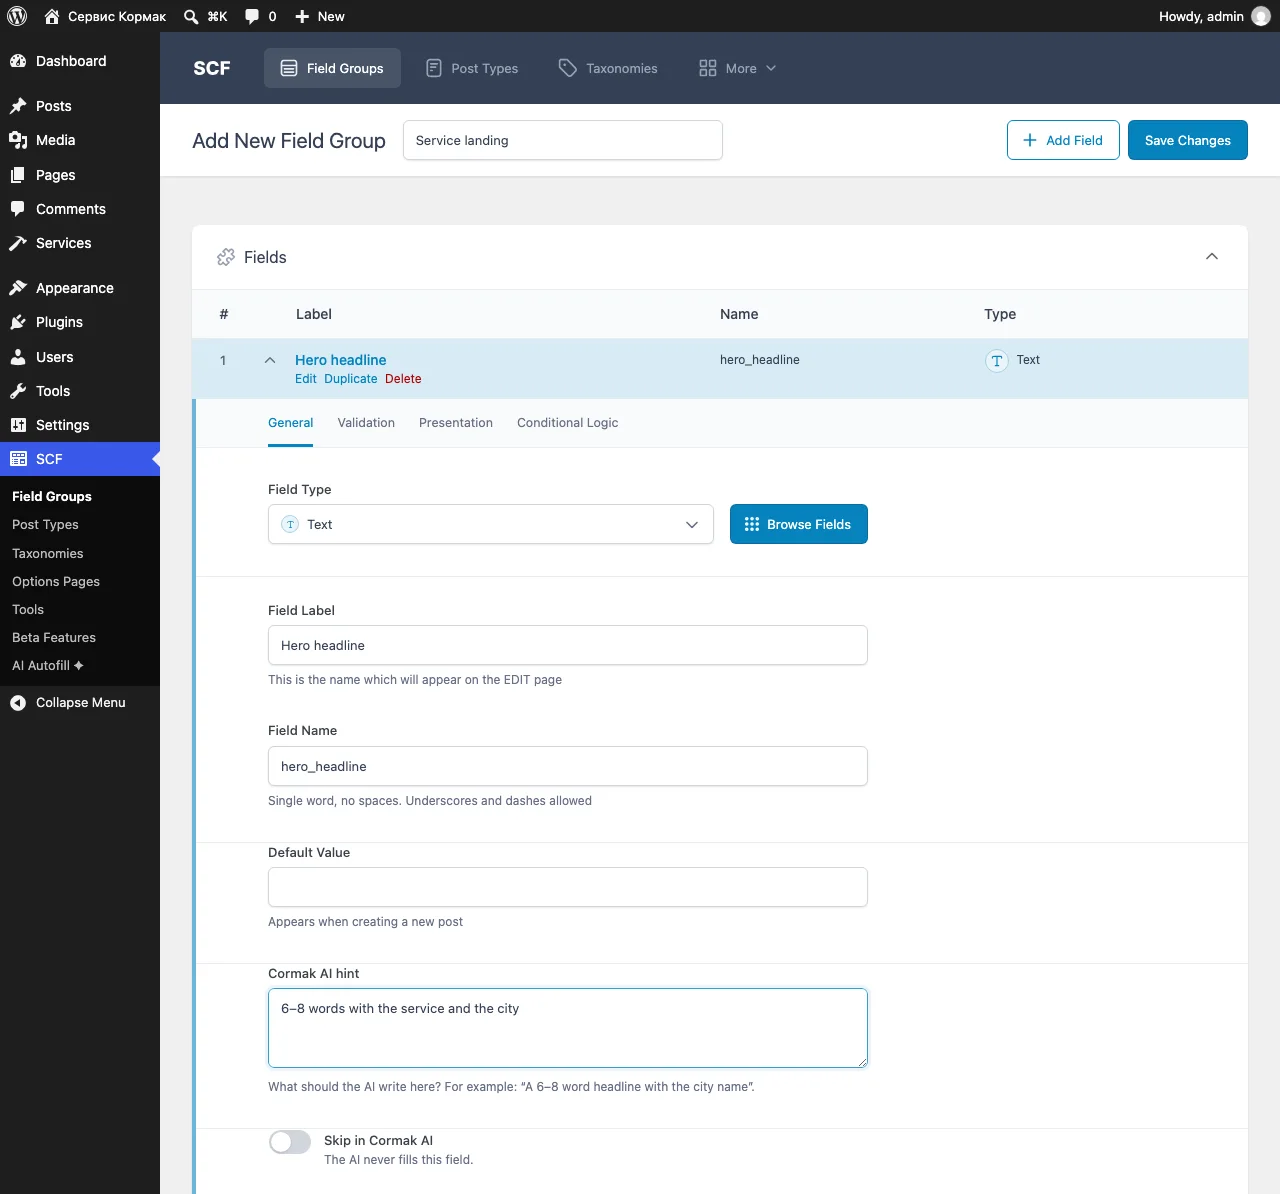
The AI already reads each field’s label, instructions, placeholder, character limit and choices. A short hint makes the result much more precise. Open ACF → Field Groups, edit a field and fill in Cormak AI hint, for example “6–8 words with the service and the city” for a hero headline or “one sentence, no prices” for a subheadline.
Turn on Skip in Cormak AI for fields that must come from you: phone numbers, prices, addresses, legal text. Skipped fields and unsupported types are never sent to Cormak.
3. Fill the fields of one post
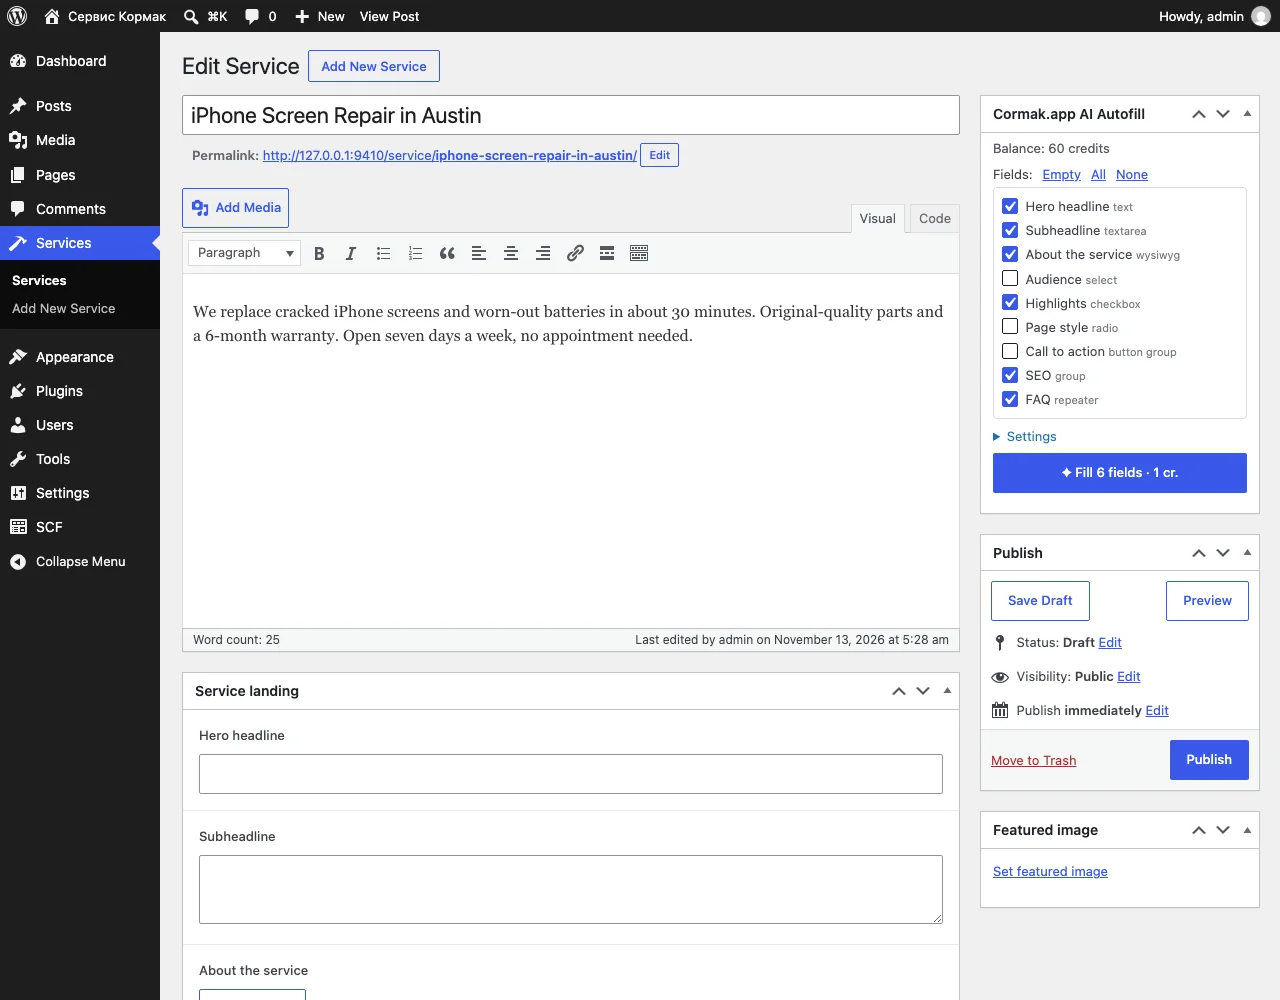
- Open a post with ACF fieldsGive it a title and, ideally, a few sentences of content. The AI treats the post title, content, excerpt, categories, tags and any field values you already entered as facts.
- Choose the fieldsIn the Cormak.app AI Autofill box, empty fields are already checked. Use All, Empty or None to change the selection. Open Settings in the box to change the tone, length or keywords for this run.
- Fill with AIClick the Fill button. It shows the number of fields and the price before you press it. A fill usually takes 5–20 seconds.
- Review the previewEach value has its own checkbox. Uncheck anything you don’t want. Choice fields show the option labels, and repeaters show the rows that will be added.
- Apply and updateClick Apply selected. The values go into the ACF form. Check them in place, then click Update or Save draft to keep them.
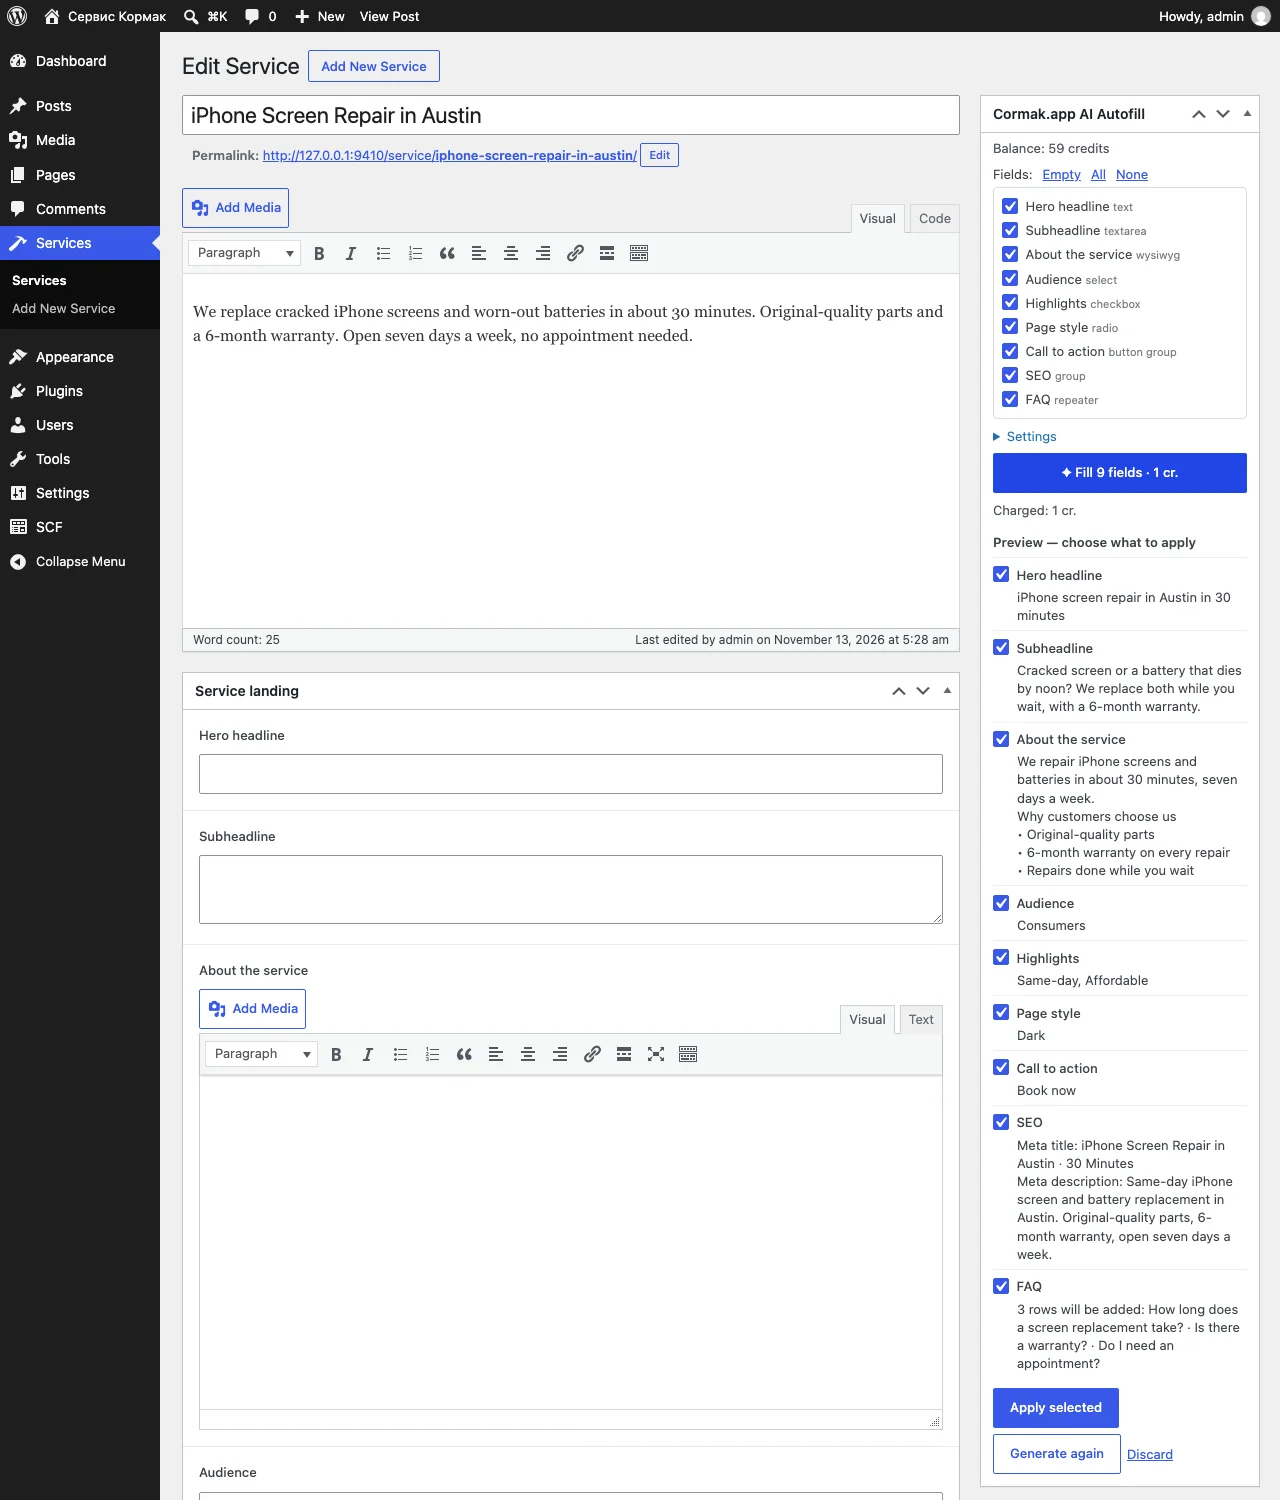
Because the values are written into the form rather than saved directly, anything you typed before filling stays as it is, and you can still edit each field before saving.
4. How each ACF field type is filled
| Field type | Result |
|---|---|
| Text | A single line within the field’s character limit. |
| Textarea | Plain text: a subheadline, summary or meta description. |
| WYSIWYG | HTML with paragraphs, subheadings, bold text and lists. |
| Select, Radio, Button group | One option from the field’s own choices (several for a multiple select). |
| Checkbox | One or more options from the field’s own choices. |
| Group | Each supported sub field is filled; with only-empty mode, filled sub fields stay as they are. |
| Repeater | Rows within the field’s minimum and maximum, up to ten. New rows are added after existing ones. |
Image, gallery, number, email, URL, date, relationship, post object and flexible content fields are not filled. A group or repeater is filled only through its text and choice sub fields.
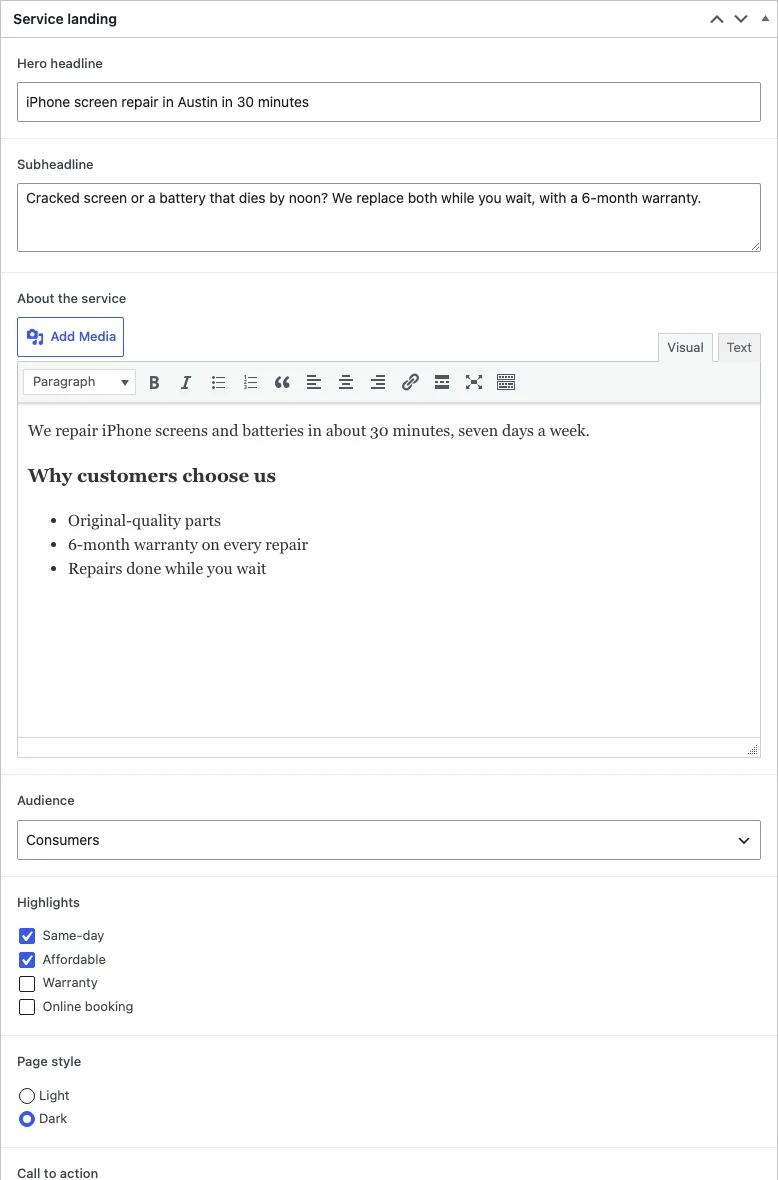
5. Fill ACF fields on many posts at once
- Select postsOpen any post list, for example Pages or your Services post type, and check the posts to fill.
- Run the bulk actionChoose Fill custom fields with AI in Bulk actions and click Apply. You land on the bulk page with the list of posts.
- Set optionsChoose tone and length, add keywords if you like. Keep Overwrite filled fields unchecked to fill only empty fields.
- Start and reviewClick Start. Two posts are processed at a time, with a status for each. Open a few posts afterwards and check the values before publishing.
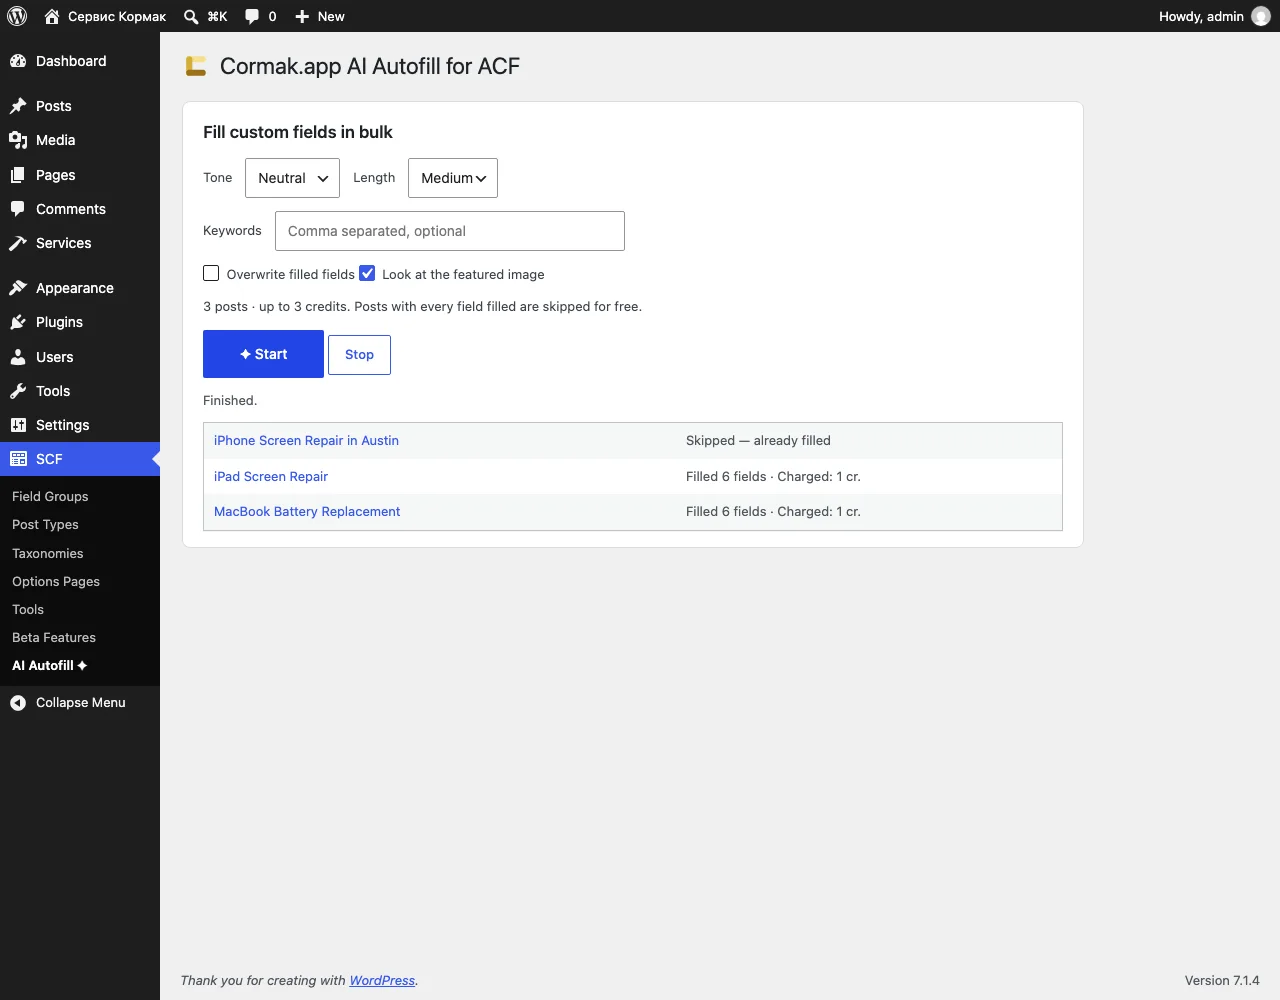
In bulk mode the values are saved on the server right away. Posts where every field is already filled are skipped before anything is sent, so they cost nothing. If credits or the daily limit run out, the queue stops and tells you why.
6. Settings reference
| Setting | What it does |
|---|---|
| Post types | Where the box and the bulk action appear. Leave all unchecked to use every post type with ACF fields. |
| Tone of voice | Neutral, friendly, premium, expert, playful or minimal. |
| Length of long texts | Short, medium or long; applies to WYSIWYG and long textarea fields. |
| Language | A WordPress locale such as en_US or de_DE. Empty means the site language. |
| Brand voice and rules | Up to 800 characters added to every fill. |
| Fill only empty fields by default | Pre-selects empty fields and keeps filled ones in bulk mode. |
| Let the AI look at the featured image | Sends a resized copy of the featured image so the AI can describe what is visible. |
Developers can change who may spend credits with the cormak_acf_capability filter. The default capability is edit_others_posts, which covers editors and administrators.
7. Prices and limits
- The plugin is free. One post fill costs 1 Cormak credit, however many fields it fills.
- Up to 40 fields per post are sent, counting group and repeater sub fields.
- The daily limit you set on the Cormak consent page caps the number of fills per 24 hours for this site. Change it or disconnect at any time in your Cormak account.
- Repeating the same request after a lost connection is never charged twice.
8. Troubleshooting
| Message | What to do |
|---|---|
| Give the post a title or some content first | Add a title or a few sentences of content. The AI needs facts to work from. |
| Not enough AI credits | Top up your Cormak balance or choose a plan, then press the button again. |
| The daily limit of this connection is reached | Raise the limit in your Cormak account under Connections, or try again tomorrow. |
| Cormak can only connect to a WordPress admin served over HTTPS | Enable HTTPS for the admin area, then connect again. |
| The AI could not write safe copy without unverified claims | Add the missing facts to the post content, for example warranty terms or materials, and fill again. |
| The box does not appear | Check that the post type is enabled in the plugin settings, that the field group is assigned to this post, and that it has at least one supported field. |
9. What is sent to Cormak
Nothing is sent until an administrator connects an account and someone presses a Cormak button. A fill sends the post type, title, content, excerpt, category and tag names, the site name and tagline, the selected fields’ labels, instructions, hints, choices and current values, your options and, if enabled, a resized copy of the featured image. Skipped fields and unsupported field types are not sent. Generated values are checked by Cormak before they reach WordPress, and the plugin validates them again before writing.